
I got married 3 weeks ago! I’m not going to go on about it too much right now, except to say that it was wonderful, everyone had a great time, and I’m enjoying how much more free my brain is without trying to remember tons of planning details. The reason I mention the wedding is because there were a few gardening themed aspects and, long story short, I promised various gardening tutorials to people. For the first of these, I’ll be starting at the very beginning: how to start plants from seeds.
In the guests’ favours, we included some seeds and peat pucks to inspire people to test out their green thumbs, so this tutorial will explain how to use them to raise your own seedlings.
There are a few different ways to sow seeds, but I’m just going to use seeds, Jiffy peat pucks, some water, and a dish that’s about 3 inches deep and large enough to hold all the peat pucks in one layer with space between them. My Wal-Mart sells the peat pucks in packs of 36 for a little more than $3.
There are 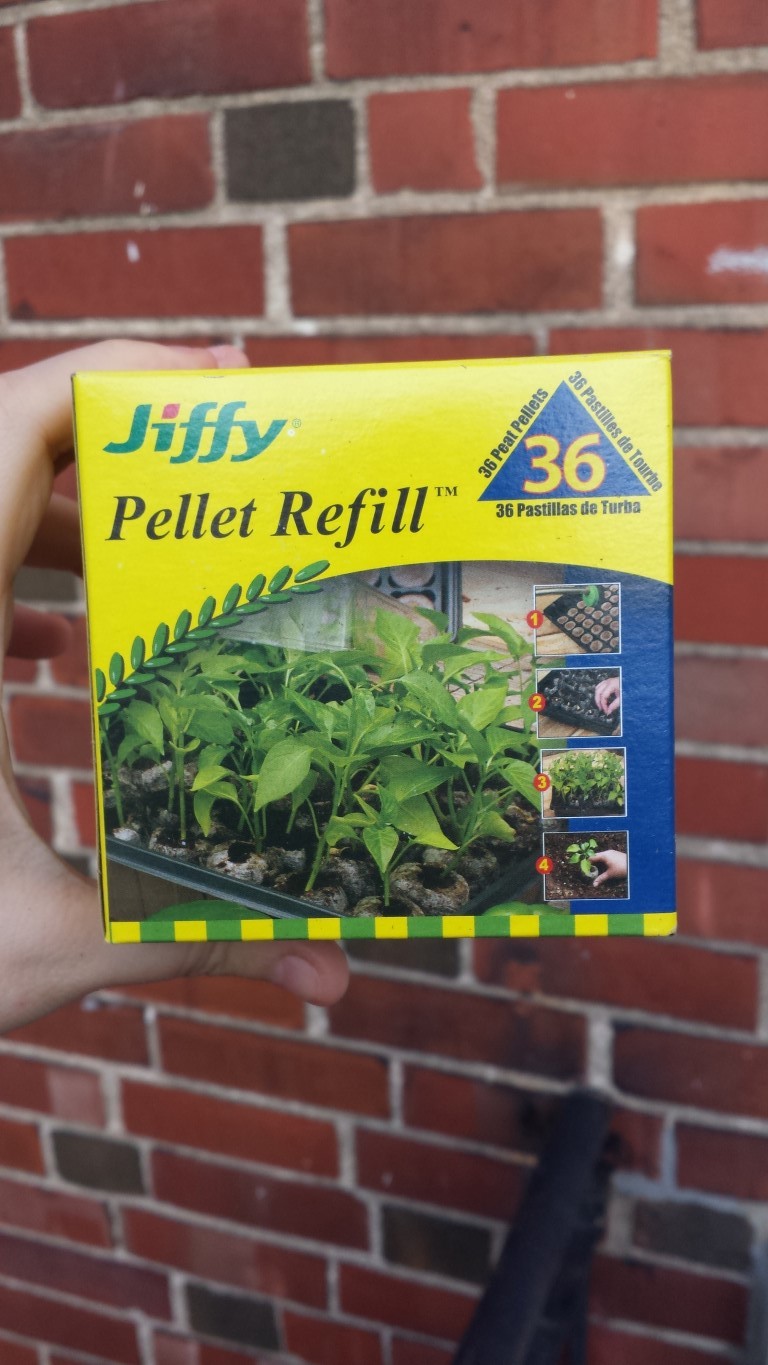 a few reasons people use peat pucks. First, it’s convenient to use some kind of starter plug because you can germinate your seeds in controlled conditions, baby them, and then transplant the successful seedlings outside once they’re ready. Second, the Jiffy ones are particularly convenient because of the fabric wrapping they come in, which prevents the plug from crumbling in your hands as you try to transplant it into your garden.
I’ve also been introduced to the idea that, at least when gardening on a much larger scale, permeable container materials have the advantage over solid plastic because they encourage an ‘air-pruning’ effect where the plant develops a small but high quality root system rather than becoming rootbound early on, so there may be something to that in this case too. At the very least, it can’t hurt aeration for the puck to be able to ‘breathe’ like that.
For the icing on the cake, the drainage and texture of the peat material is great for baby plants: it stays moist but not soaked, and it’s substantial enough for rooting but light and fluffy enough enough for sprouts to push through easily. There may also be something beneficial about the nutrients (nitrogen rich?) or the pH (acidic?) of the peat, but I haven’t found any particularly good information sources for that.
First, we need to hydrate the peat pucks. Trivia: Peat is decomposed plant matter which comes from a particular bog-type ecosystem called a peatland. The thing that makes it special is that the vegetation decomposes in the absence of oxygen. Peatlands actually act as a very effective ‘carbon sink’ because the plants in the bog are particularly efficient at absorbing the CO2 from the air.

To rehydrate the pucks, put a little more than 2 inches of water into your dish. Next, examine your peat pucks. One flat side should be plain while the other probably has a dent and a circle stamped onto it, making it resemble a target. The fabric casing is not closed on the ‘target’ side, so this side should point up when you submerge the puck in water. Otherwise, the peat, which becomes quite delicate and fluffy when hydrated, can scatter into the water through the opening when you try to lift the puck.
Set the puck into the water target side up, and wait maybe 5 minutes until it looks like it has stopped growing. Don’t worry about pushing floating pucks down into the water, it’ll sink on its own as it soaks up water. Also, if you notice that your water isn’t deep enough and you need to add more, don’t pour it over the pucks because, again, it will make the peat scatter. You’re better off lifting the pucks out, adding water, and then putting them back in.
After the pucks are done expanding, lift them out of the dish, dump the water, and then set your expanded peat plugs back in the dish. Keeping the plugs in a container with walls will help shield them just a bit so they don’t dry up too quickly.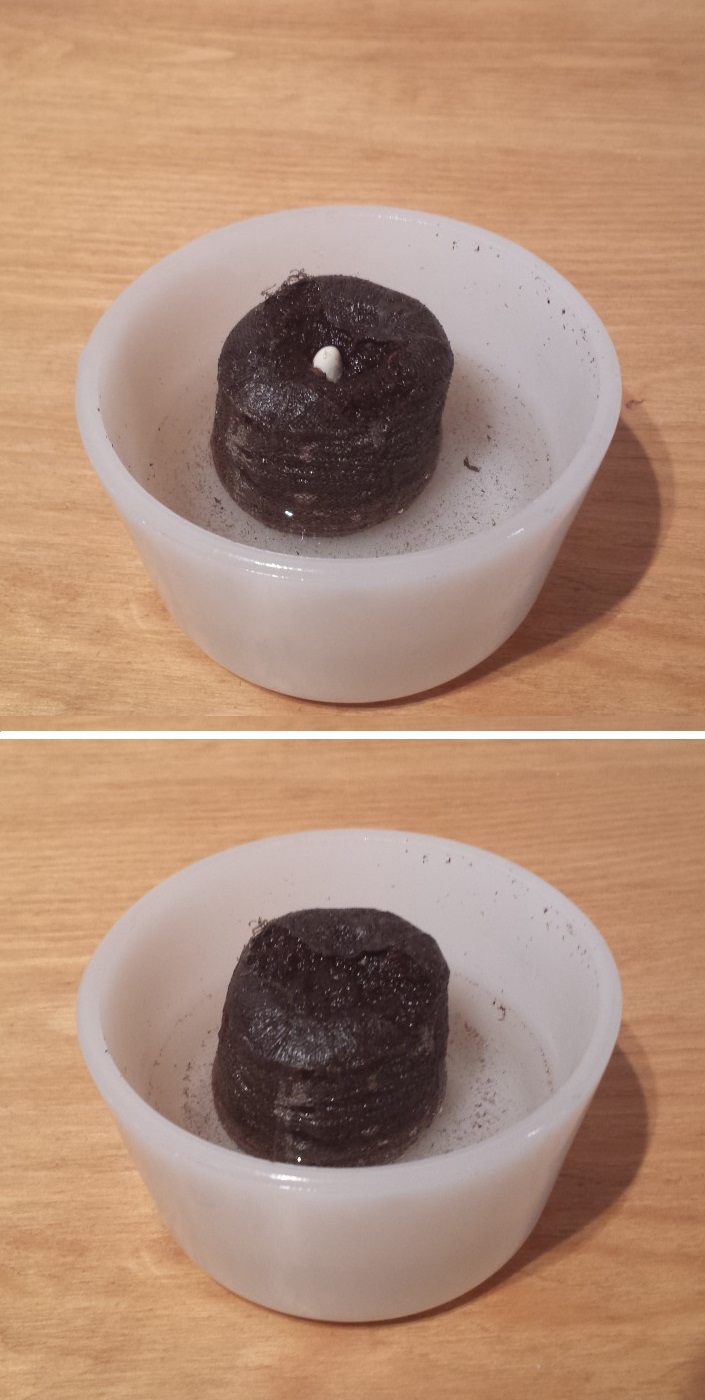
To plant your seeds, just set one or two seeds (depending on their size) into each peat plug, pressing it down into the dip and covering it with loose peat so it’s buried about .5cm (for small seeds) or 1cm (for larger seeds) deep. Like these pictures, except without the water in the bottom. These were from my first experiment and, not being used to peat, I didn’t realize it would oversaturate itself and get moldy if left in water. Lesson learned: after the initial soaking it stays moist without sitting in water.
At this point, it can pretty much sit until you see your seed sprout, with no intervention except to maybe drop a teaspoon of water into the plug every couple days after the first week if the seed is taking a long time to germinate and the plug starts to feel dry when you touch the sides.
Once you see leaves sprouting you could theoretically transplant it into the ground or a larger container, but keep in mind that you have a degree of control over the peat plugs – the ability to move them to a sunny place, or keep them somewhere warm at night, or give water directly to the root area – that will be lost when you transplant them into the ground or a larger container, so it can be good for the plants if you wait a little longer and baby them some more before transplanting them. To care for the plants at this point, move them to a window so the cotyledon (those first little leaves) can catch a little sun and green up. It’s also okay to give a spray of water into the dirt if the plant is sucking up all the water you give it. What I do is touch the sides with my fingers: a germinated plant is ready for more water if the soil has become dry to the point where the sides of the plug feel just barely moist.
That said, the cutoff point at which you really must transplant your plants into something larger is when you see roots which are exposed to air and are starting to dry out. Dry roots are dead roots, so once you see roots poking out of the fabric and into the air it’s time to transplant. What does this look like? As it happens, I have a couple very borderline cases right now that I can share with you!
I’m starting two pea plants for a special project, let’s call them A and B. As you can see, they haven’t really put out leaves yet but each has made a single giant root which has shot straight out of the plug. Normally a big thick root like this wouldn’t develop right off the bat, it’s only huge like this because it’s from a large seed like a pea which maybe should’ve had a larger plug.

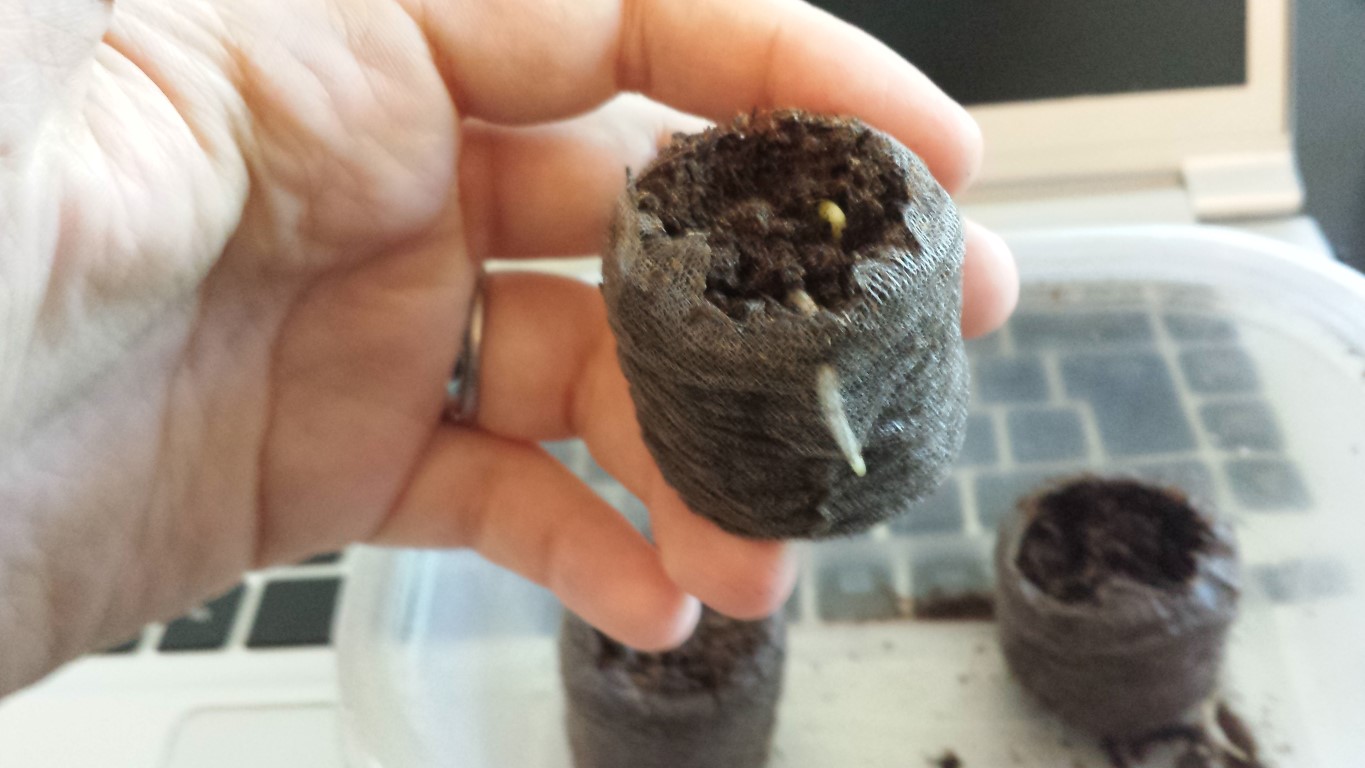
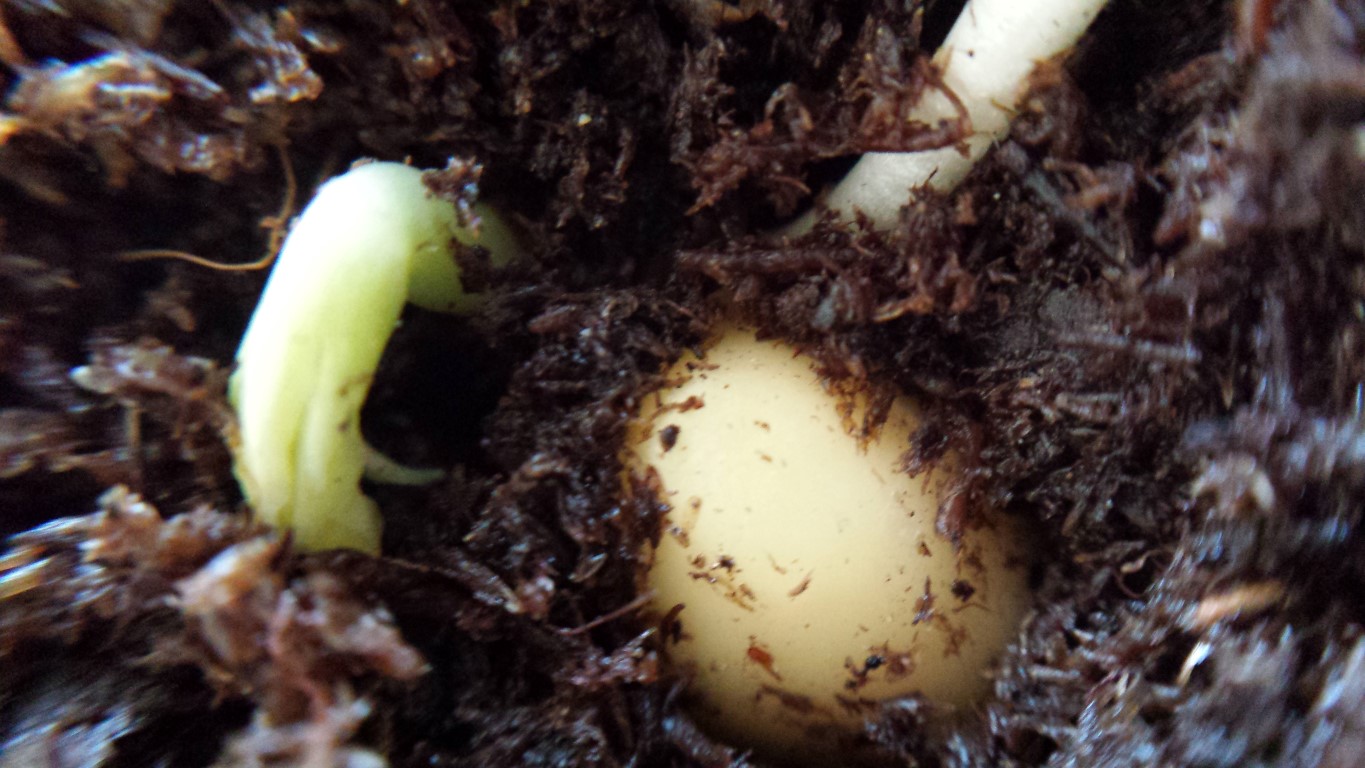
The first one has a root that came out the bottom and was smartly reaching into the gutter of the tupperware container to find a puddle of water, and the pea for the second one was oriented unfortunately so that the root pointed up and the cotyledon pointed down, so the root is taking the very scenic route to the bottom of the plug. Because I like playing with the clip on macro lens I have for my phone, here’s what that second plant looks like with a little of the soil moved aside to expose the pea:
The exposed roots in both plants have done okay so far, but both root tips are getting just a little bit brown, a sign that they’re starting to get fed up with being exposed to the air. This means that these plants will need to be transplanted in the next day or so even though they don’t have leaves to speak of (nothing for A, and B’s is just breaking the surface). Until I can transplant them, I’ll check on them every few hours to mist the roots and keep them from drying out.
By the way, want to see something cool? I noticed that the part of A’s root which wasn’t touching water had developed into an air root, so I took a picture of it using my little cell phone macro lens:
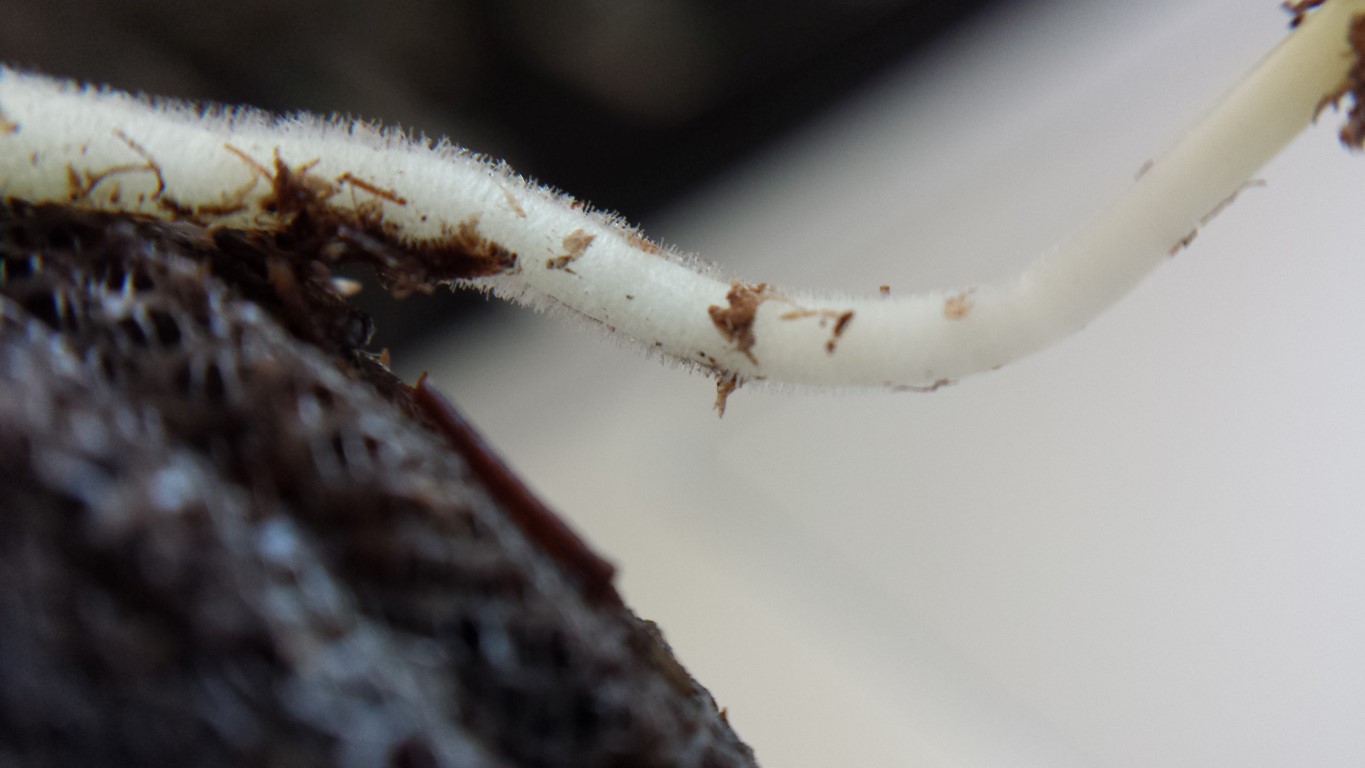
An air root is something that develops when an existing root is fully exposed to air but is kept humid enough that it doesn’t die. These roots grow fuzzy little hairs on them and are a wonderful thing that we carefully nurture in certain kinds of hydroponics, though I don’t really know if the purpose of the hairs is to suck up more oxygen or to protect the main root so it can’t dry out. What I do know is that air roots are delicate, and if they do get wet then the little hairs will get slicked down and not return to their fuzzy state for a long time, if ever. Not that it matters in this case, though. I just need it to hang in there for another day or so until I can buy more soil for transplanting.
Well, that’s it for this post. Stay tuned though, because I have a whole list of other gardening topics that I want to cover in future posts:
- Growing mediums for germination, hydroponics, and container gardening
- Extra tips for germination
- Intro to hydroponics: basic principles
- Overview of different hydroponic system types
- Tutorial for an easy DIY non-circulating hydroponics system
- Tutorials about individual indoor or balcony growing projects
- and more!
Until next time, happy planting!