
The end of July is approaching, but mentally I’m already preparing for late fall, trying to brainstorm ways to transition some of my balcony projects indoors.
For some of them, I’ve been thinking about cloning. I don’t have any experience with cloning yet, but I’ve been meaning to learn. Making hydroponic clones of some of my container projects would be a perfect way to hang onto my summer projects a little longer while also learning a new skill.
From what I’ve read and heard, cloning for hydroponics doesn’t need to be very different from cloning in soil. If you have any favourite tricks for taking cuttings, you can do as you usually would and then just pop it into some prepped hydroponic media instead of soil. For a different way, though, you can also suspend the cuttings so that the cut ends are submerged in aerated water 24/7. To learn more about cloning that way, look up how to make a bubble cloner.
What can be cloned? Any plant whose stems are capable of putting out new roots. This includes most trees, but some other plants like mint and tomato are well known for throwing down new roots from branches which find themselves in contact with the ground.
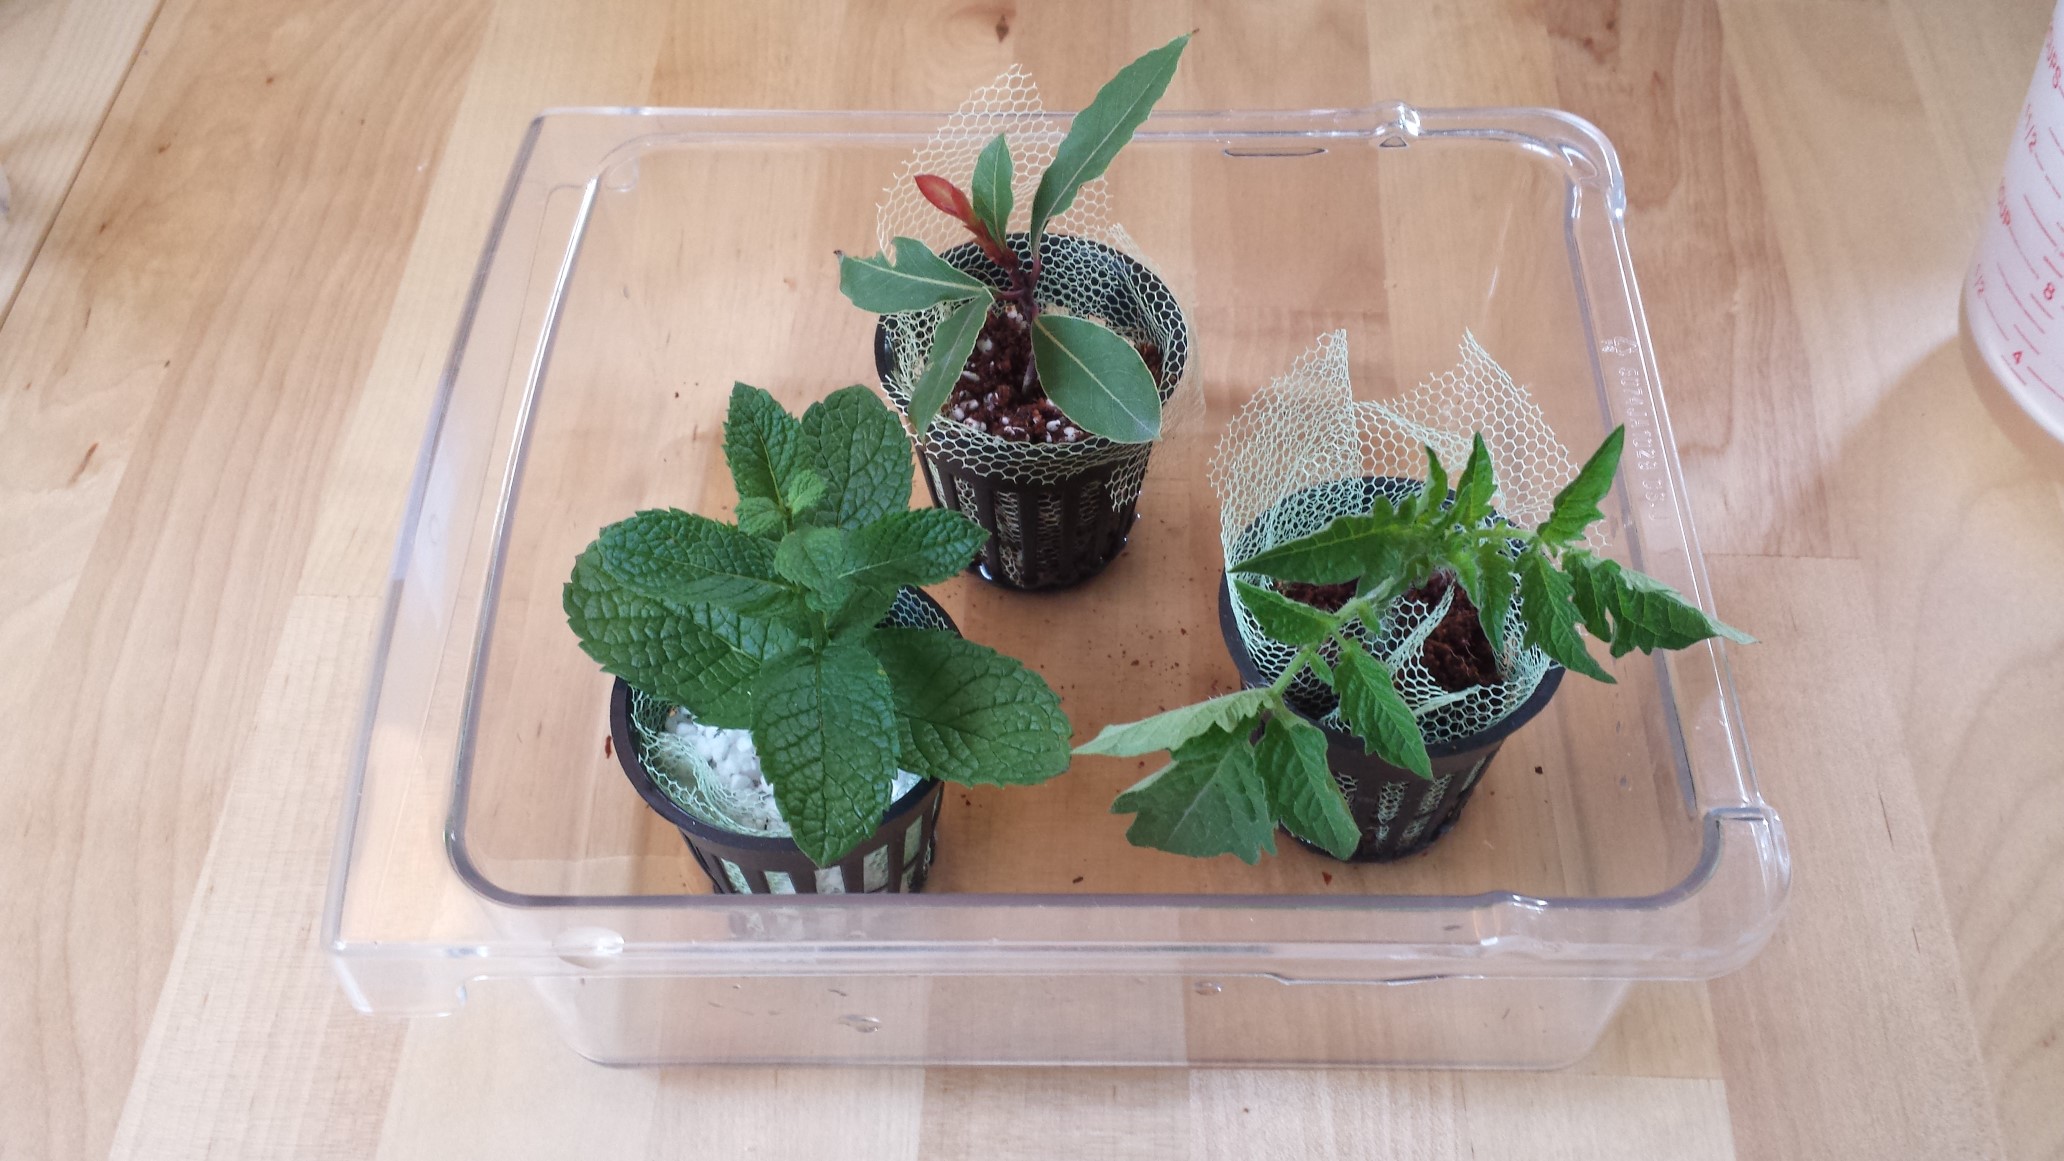
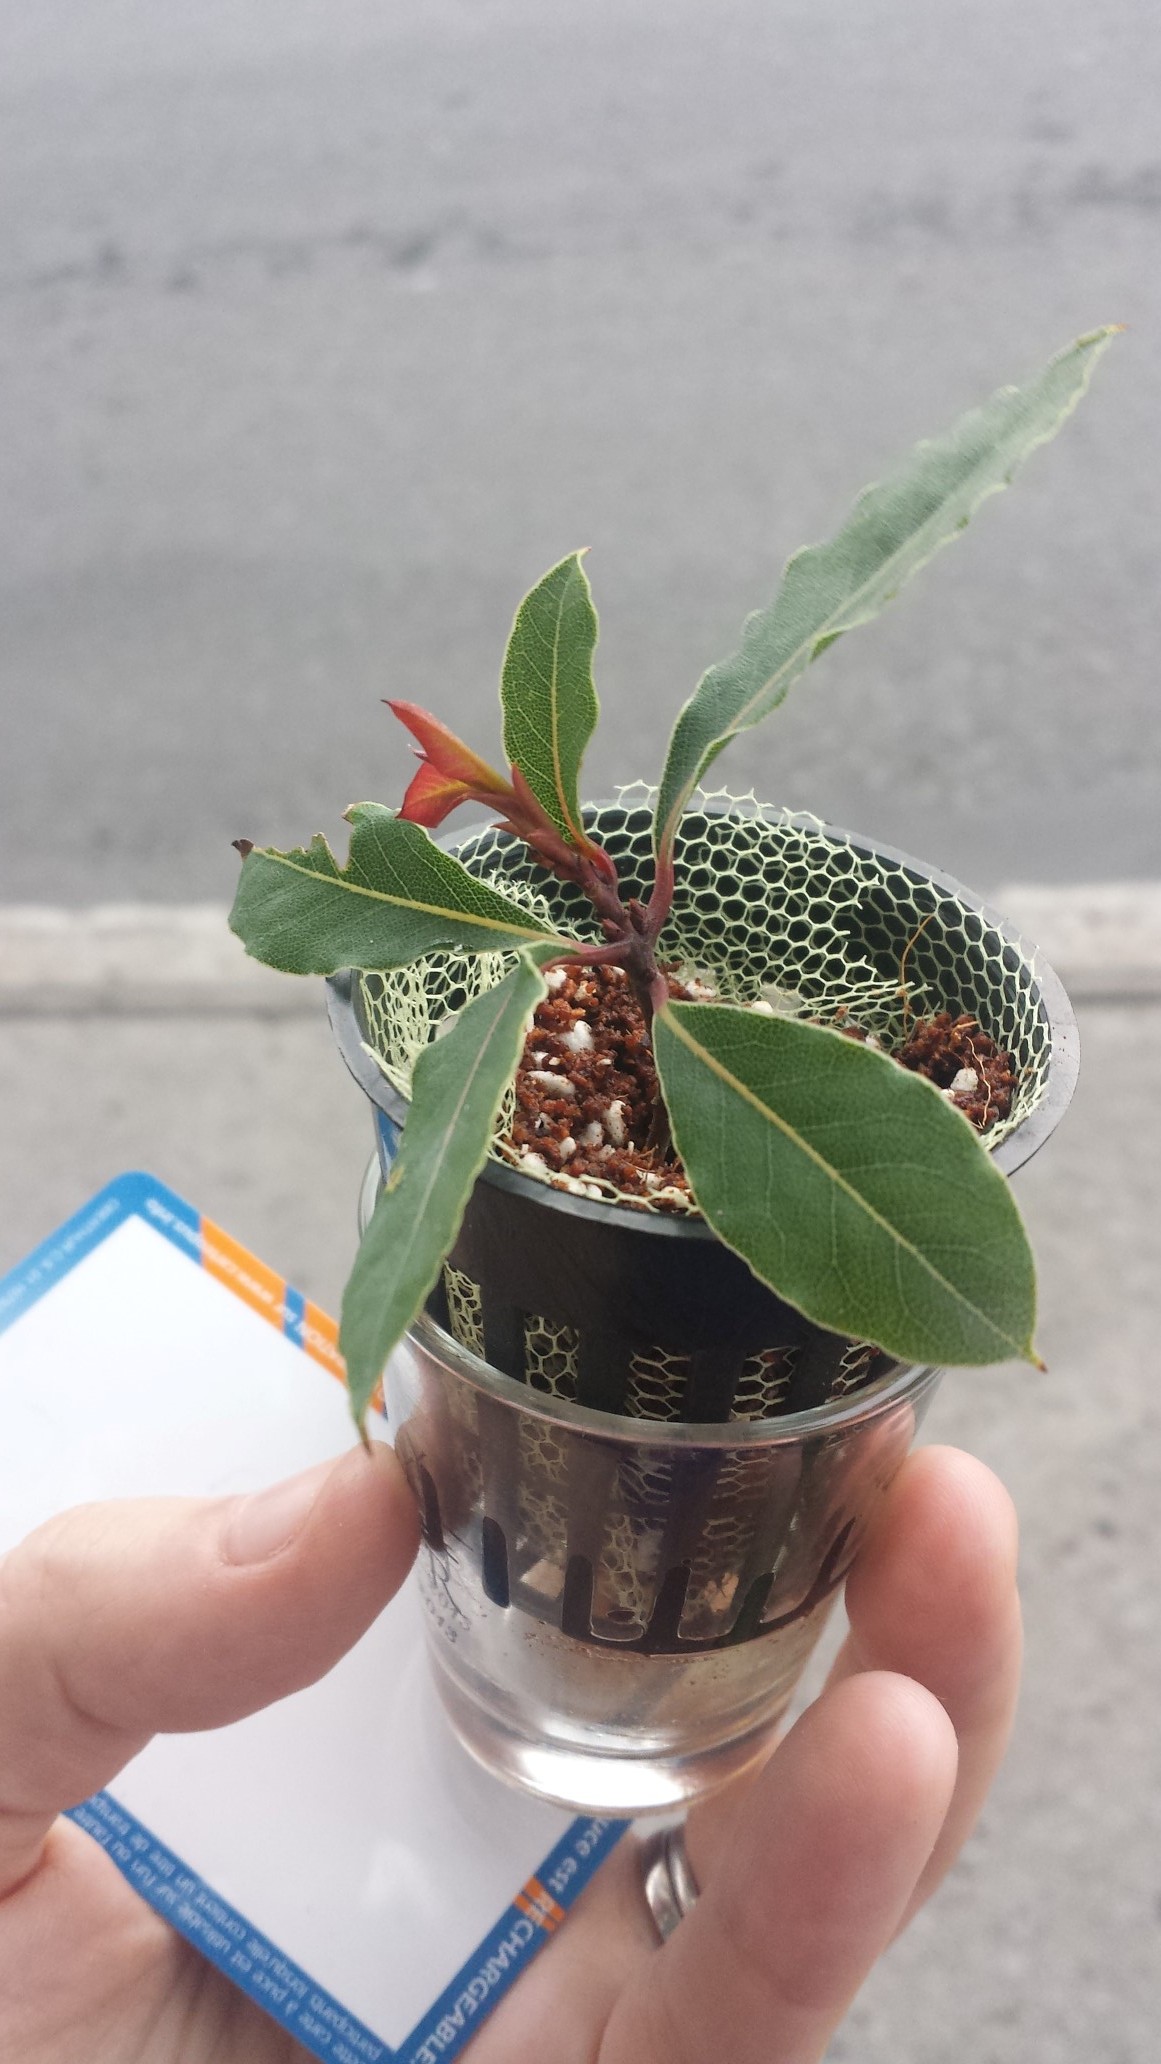
I’m going to try to clone three plants: my Moroccan mint, my Siberian tomato (at least I think that’s the variety), and my bay laurel tree. The mint is because I’d like to have a mint indoors and it takes an eternity to germinate from seed, the tomato is because my Tiny Tim tomatoes have done amazingly well in the window and maybe I could pull this one off as well, and the bay laurel is because a friend expressed interest in it once and I’d like to give him one to try raising.
I was planning to also demo how to prep rockwool, but I left the rockwool at Helios after last week’s workshop so today I’ll demo something else that might be of interest: how perlite and/or coco coir can be used as a grow media even if the grains are small and prone to falling through the net cup holes. Since coco coir and perlite are two of the cheapest media, it’s good to have a way to use them in netcup applications. To clone with rockwool, prep the cubes by soaking them for 20 minutes in water whose pH has been adusted to 5.5, and then when your cutting is prepped just push it down into the hole in the rockwool cube.
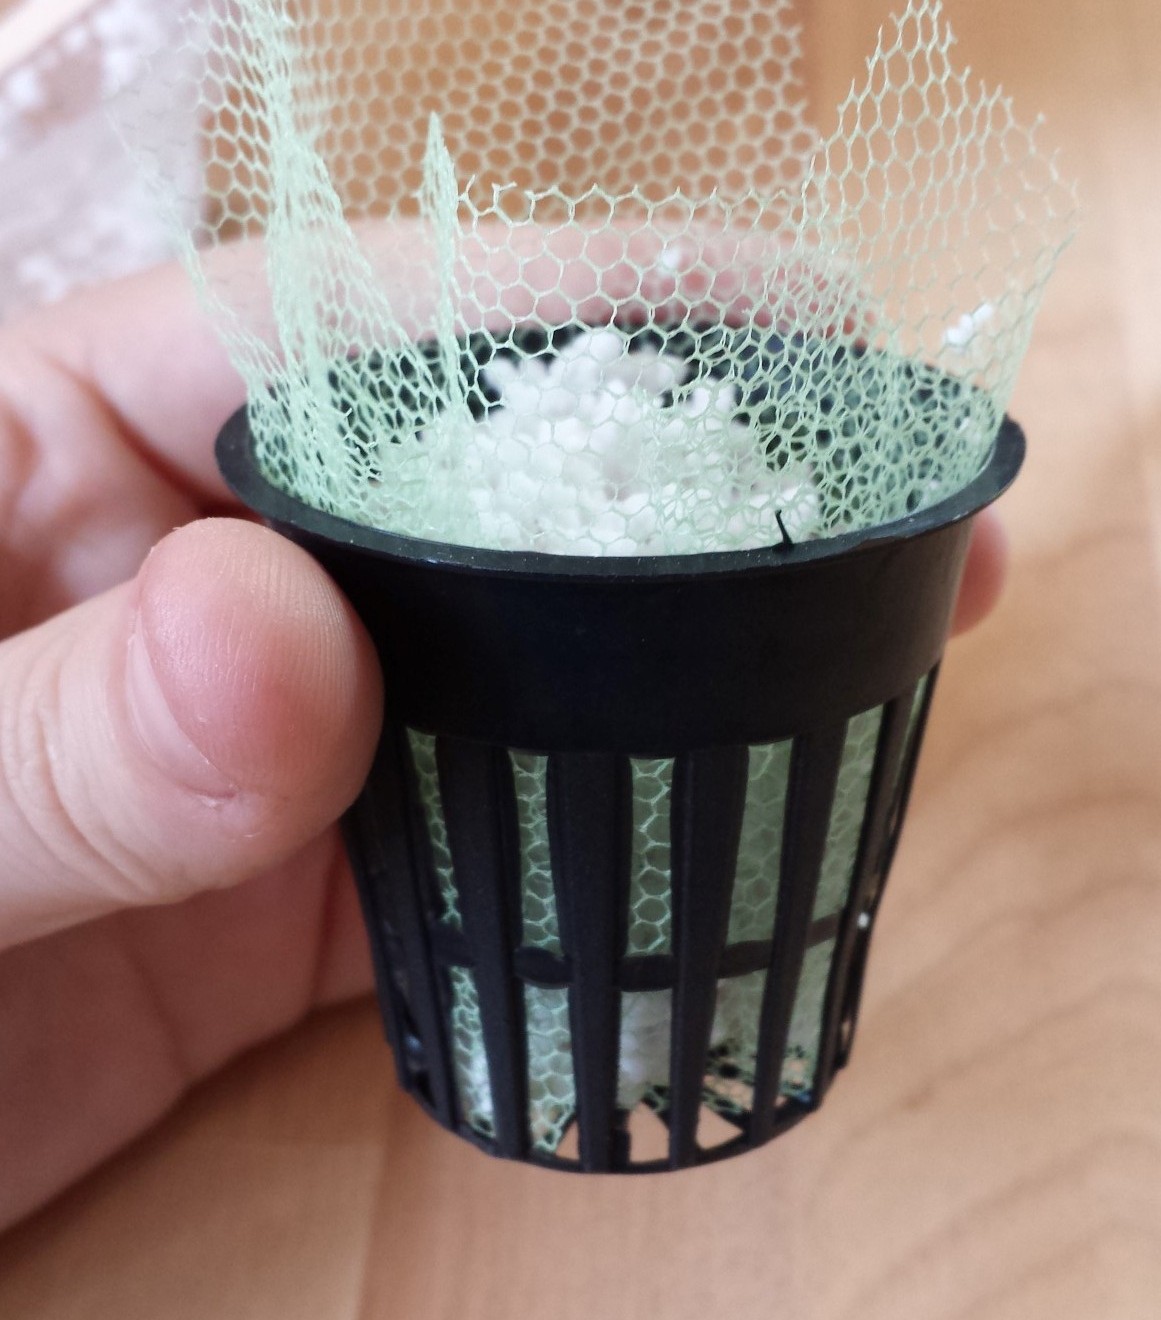
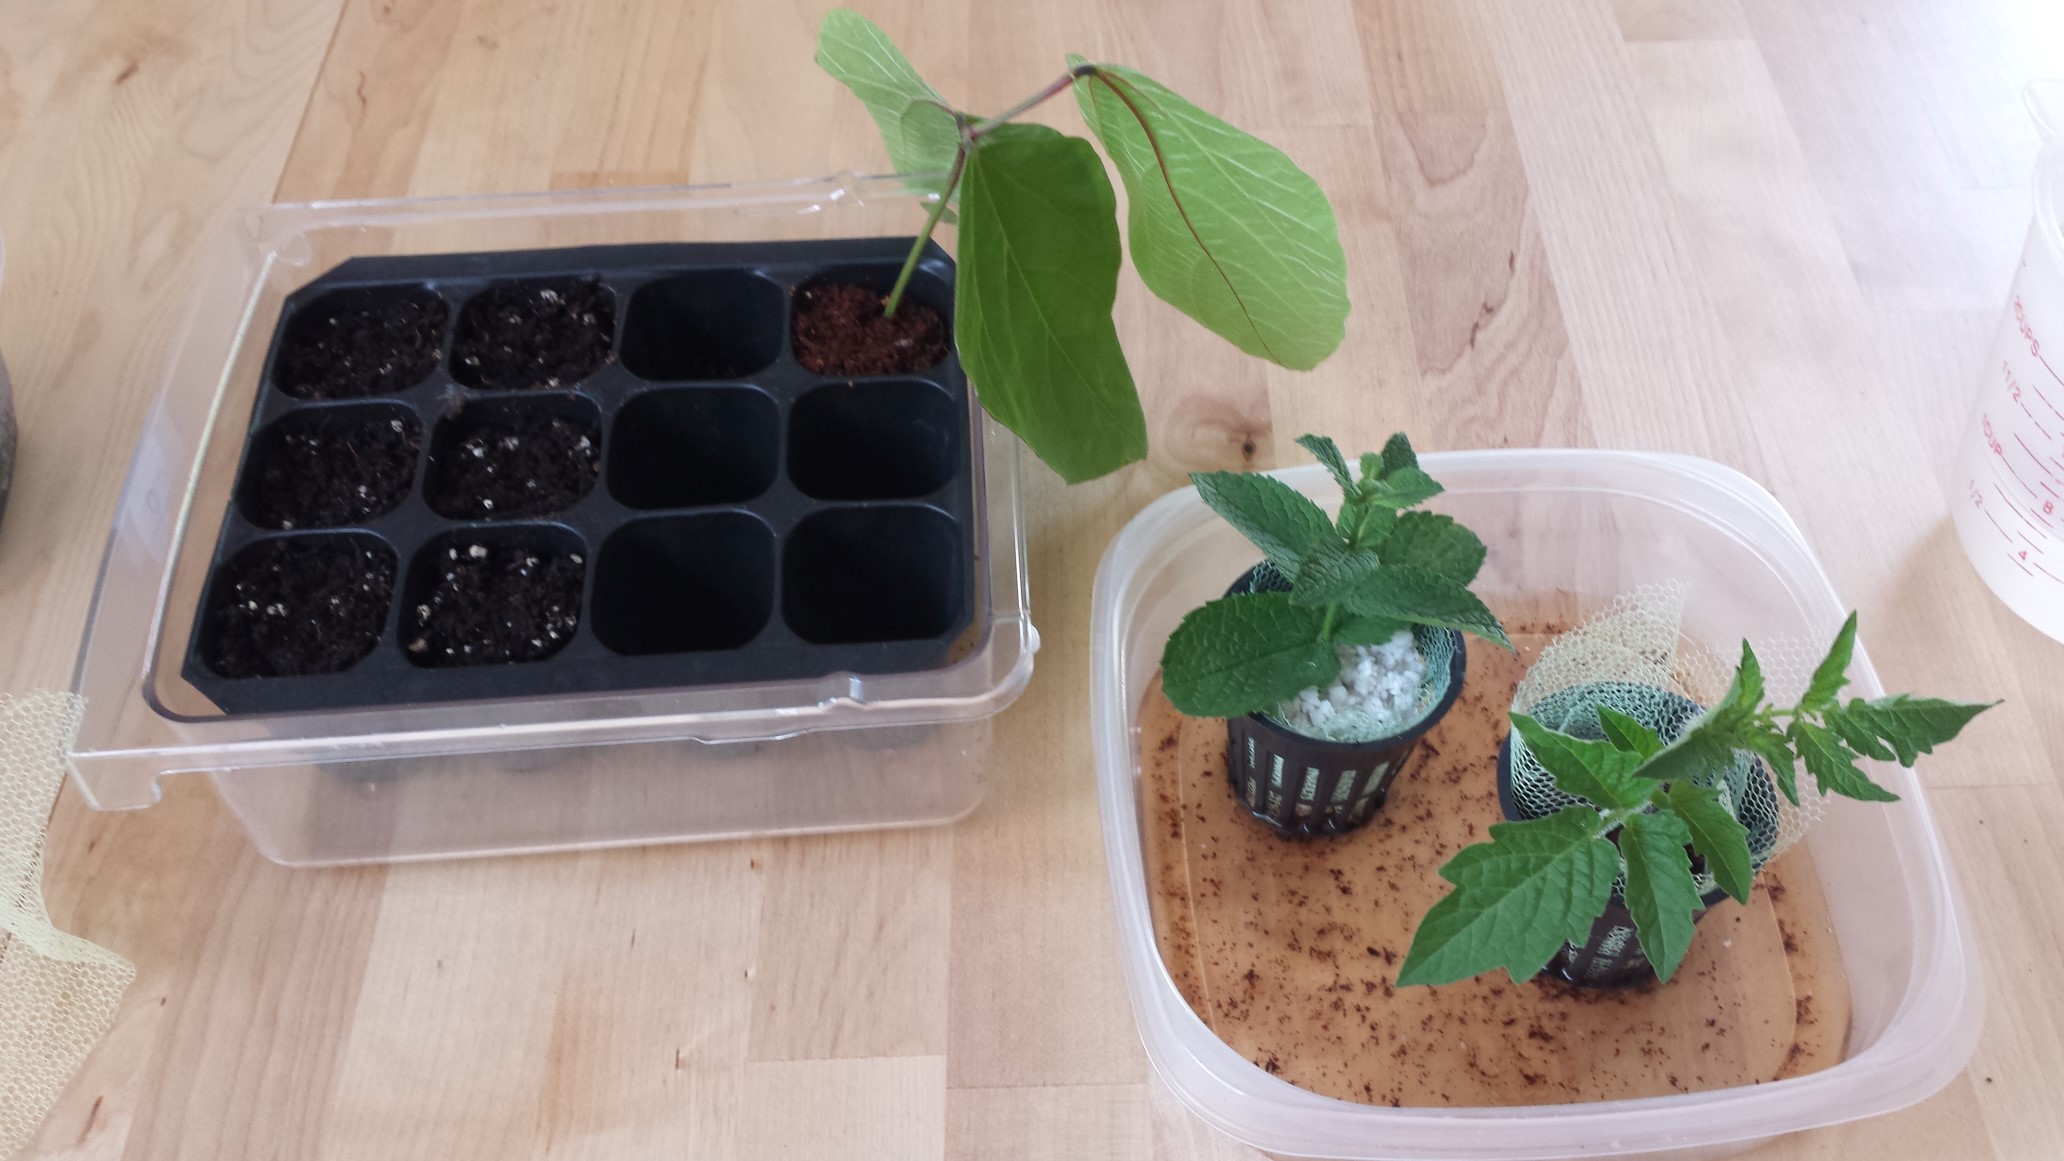
In my first Kratky systems, I improvised net cups from pudding or yogurt cups and lined them with cheesecloth because my coco coir (bought in bricks at Que Pousse) and perlite (in a bag from Canadian Tire) were both too fine and would otherwise fall through the holes in the net cup and into the water. Cheesecloth initially worked like a charm at containing the loose media but it decomposed extraordinarily fast, disintegrating in a matter of weeks and creating mold issues in the process.

Although cheesecloth wasn’t meant to be (I eventually ended up repotting those plants in new netcups and sterilizing the old coco coir to get rid of the mold for good) I found a better solution on my next attempt: relatively fine plastic netting.
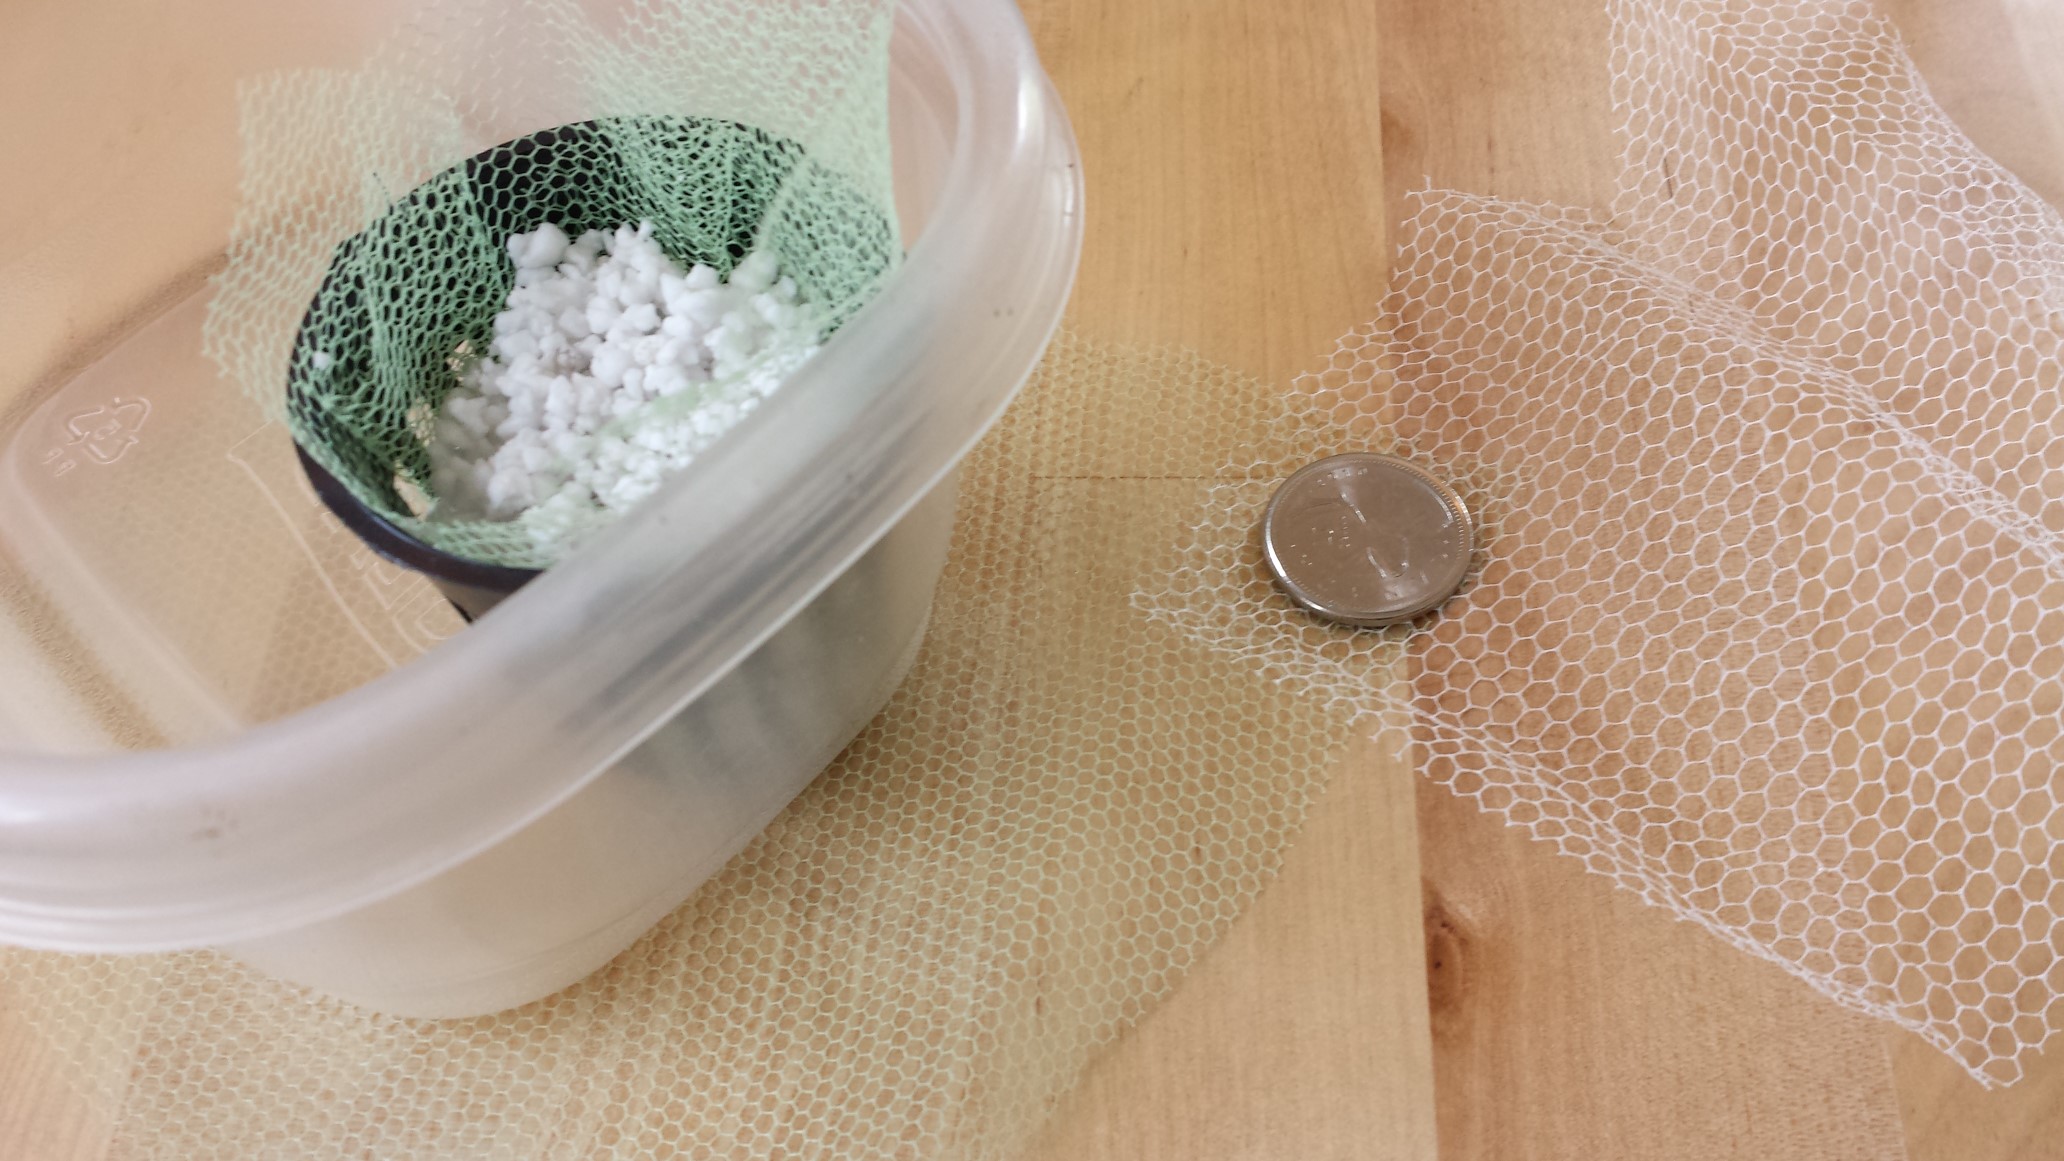
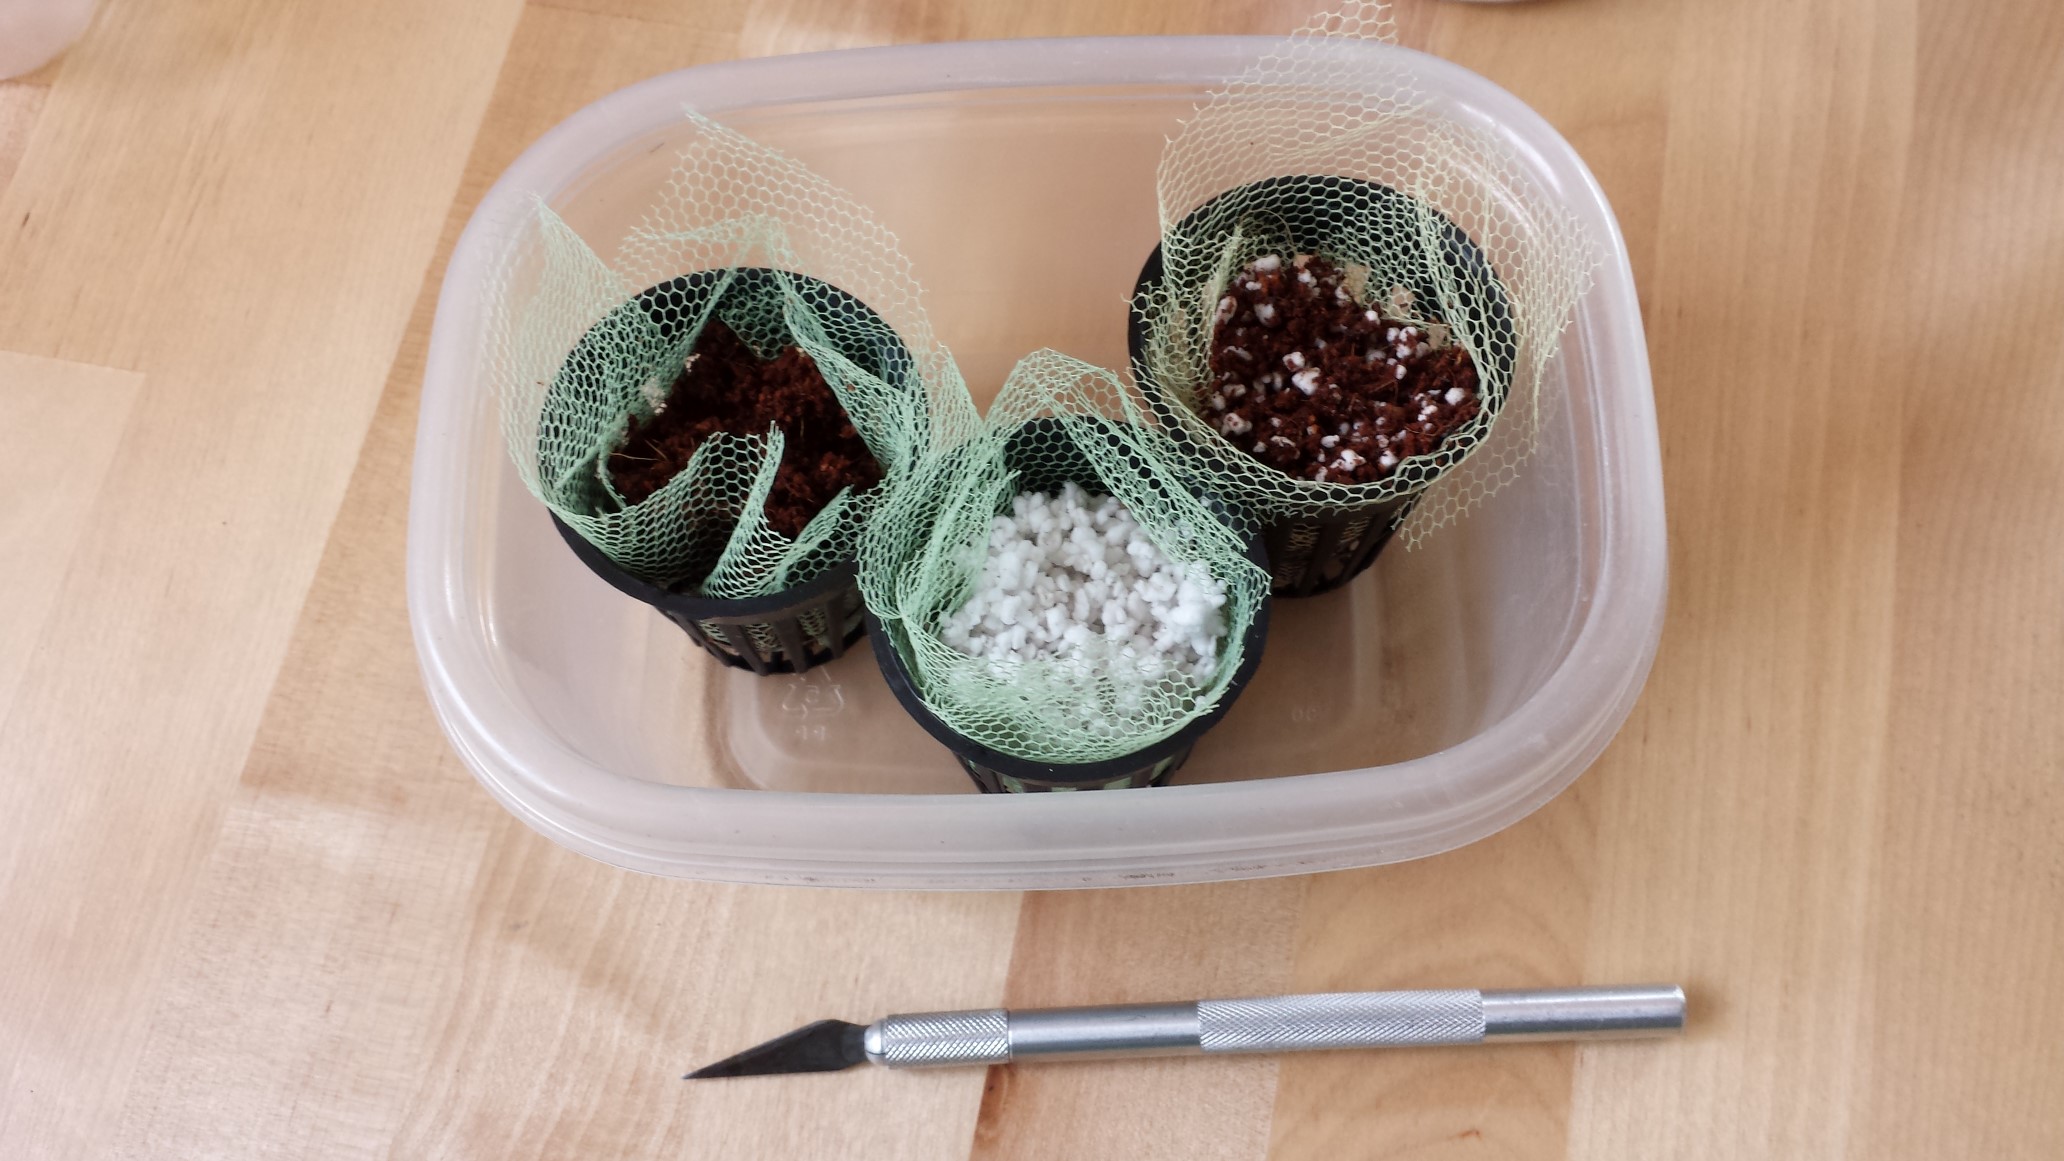
I’m not actually sure where you can buy this kind of netting, I got some from my mother who has a big supply and cuts pieces to use for things like scrubbing dishes. In mesh size, you want holes small enough to keep media in (at least at first, before the roots start to grip the media and secure it) and large enough that the roots won’t choke as they thicken.
I’m going to prep three net cups: one with coco coir, one with perlite, and one with a mix of the two. This is pretty much just so I can see how well the mesh holds each, and also so I can see later how moist each stays in hydroponics due to capillary action. I pressed the mesh down into the cup and then scooped the media in with a popsicle stick. I moistened the media well first, because it’s easier to get it cleanly into the net cup that way and because I’ll want it moist anyway for planting. I didn’t press it all the way into the bottom because I wanted to leave room for roots to fill out the space.

To clone the tomato, I looked for a sucker, which is a new stem pushing out of the ‘elbow’ formed by a stem and a branch.
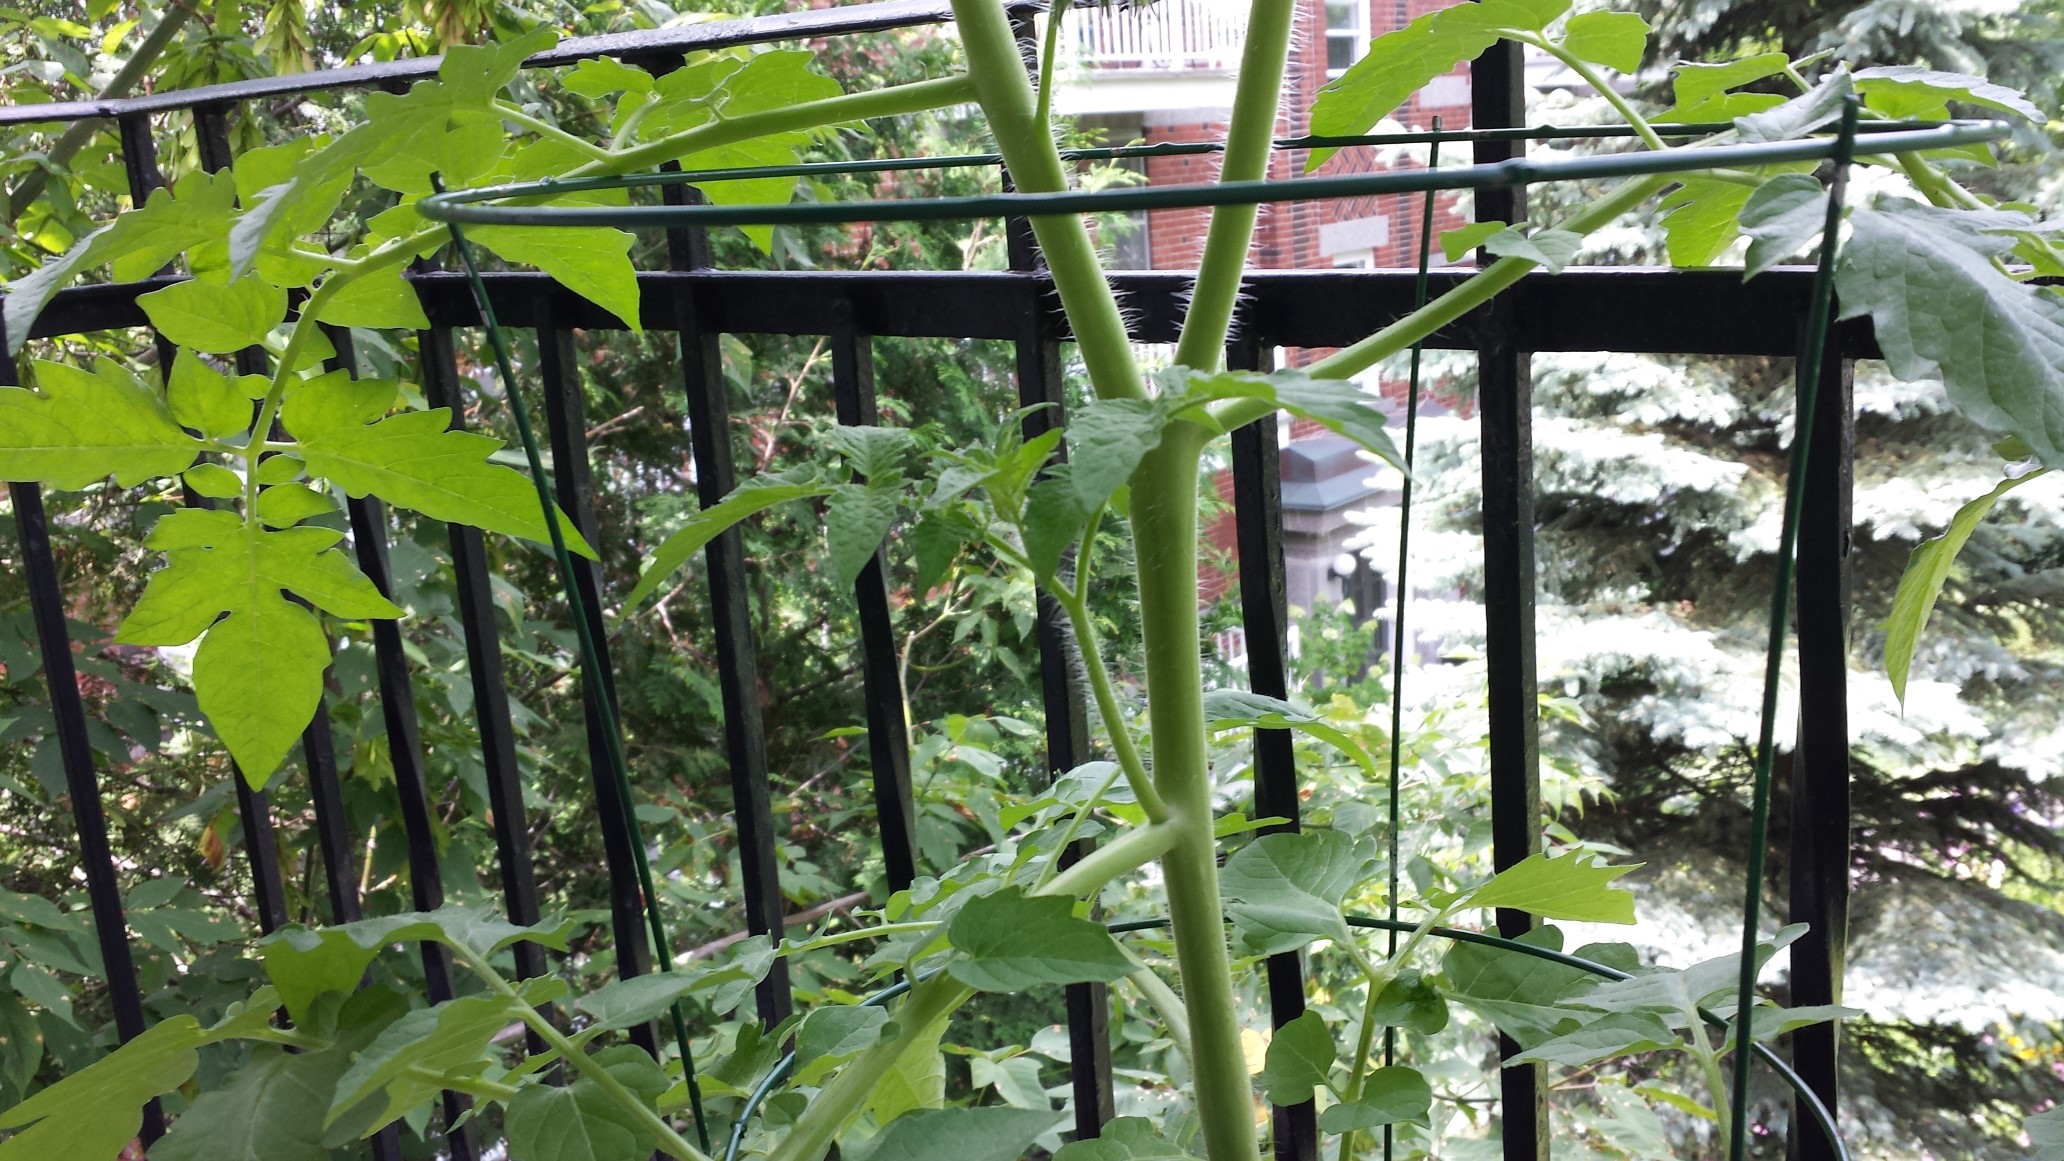
I was able to pop the sucker off using just my thumb, causing it to break at the base where the tomato plant can easily seal off the injury. I then sterilized my razor knife and recut the end of the tomato cutting to be a nice clean cut on a 45 degree angle. The angling gives the open stem more surface area from which to begin taking up liquid and putting out roots. If your media isn’t ready yet, set the stem end of the cutting in water immediately after picking. You want the cut end to be exposed to open air for as little time as possible so that air bubbles aren’t taken up into the stem. If you have a rooting hormone powder, use it just before putting the cutting in the media.
For the mint and bay laurel, I tried to choose tips of the plant which had both old and new leaves. The mint cutting had a flower so I trimmed it. The bay laurel cutting really should’ve been longer, say 4-6″, but the original plant is slow growing and not very large so I didn’t want to set it back by taking a large cutting.
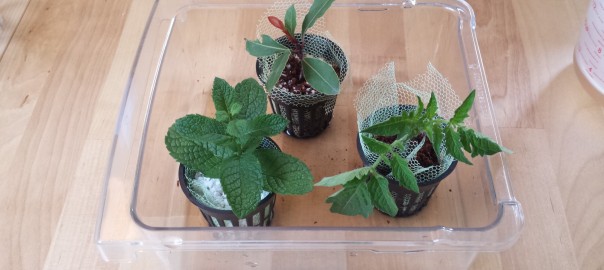
Finally, I put the net cups in a container with some water and a little Supermax B1, because I know it reduces plant stress and helps plants recover from transplantation, and I figure this is like a really extreme transplantation. To maintain the clones until they take root, I’ll set it somewhere indoors and away from direct light and I’ll maintain the liquid level to a height of a few mm.
To really micromanage, I could set each net cup into a shot glass and fill it with water (or my pro-transplant nutrient solution) to a few mm above the bottom of the net cups. This also has the advantage of allowing roots to grow up to an inch of roots in a protected environment before being set into a system which is monitored less frequently. Of course, it’s also good for moving a single plant, so I used it to take my friend his hopeful future bay tree.
48 hour update: I don’t know how the bay laurel is doing because I gave it to my friend with instructions to hopefully keep it alive, but the mint looks unchanged and the tomato got really droopy for a day and a half but has now perked right up. So far so good?
I also threw a cutting of my prolific scarlet runner bean into some coco coir, just as an experiment. I read that beans are easy to clone but that people usually don’t bother because it’s so fast to just grow new ones from seed, and I thought I’d try anyway because it seemed like good cloning practice if nothing else. The six plugs of homemade potting mix are rapini, by the way… it’s supposed to have a short maturity so I’m going to try and pull it off outdoors.